
Tuesday 13 July 2010
I'l be back, but not for a while
I'm off on a volunteer trip to Ghana to teach English for the next 7 weeks, so until then its bye-de-bye blog-land until my return.
Sunday 11 July 2010


Tale of the Mad Hatter

The latest Custom Costume Company project is a hat, something we have not attempted before. It is of the cute miniature kind, the kind that perches on neatly arranged hair, and assists the look; rather that squashing the do flat and providing the wearer with the oh so dreaded "hat hair".


Lots of layering is involved, buckram for stability, felt for padding, silk for decoration. This means lots of sewing (although admittedly not as much as a full sized hat) through lots of layers, thankfully this part wan't my job. I could tell how tough the work was by the pinkness of the fingertips and the pile of bent and broken needles.


Beads and silk flowers at the front and feathers at the back were the final touch. I learned the hard way that it is definitely not the best idea to bend up the brim and fix it in place before adding the beads. I had to use a needle so curved it was almost a complete circle in order to stitch these on.
Tutorial: Modesty Panel
The modesty panel is the rectangle of fabric that goes in the space behind the lacing on a corset. It is much neater than skin when you aren't wearing anything underneath the corset.

The size of the rectangle is the width of the gap in the lacing plus about 2", by the height that will look right, this varies corset to corset depending on the style, so its a matter of personal choice. Cut this out on the fold of your corset fabric, plus seam allowances.


Pin the long side of your rectangle to on side of the corset. I have slide mine under the bias binding because there is a gap, but if this is not the case it doesn't matter.


Stitch down with small neat stitches. If the modesty panel is probably going to be removed the just tack it..


Finished, now it is ready to lace and wear.
Thursday 8 July 2010
And fin

Flatmate-Weathers' corset is finished, bound and eyeletted, with the exception of a modesty panel and a bag to put it in which will come later. I will take some much better photos when i have daylight, time and an appropriate length of corset lace.

Positives: Colours and fabrics work very nicely together, embroidery on the front panel lies smooth and flat, not too much puckering, neat bias binding, slimming effect from colours, good length.
Negatives: Strange thing going on around the bust channels - not quite sure what that is, slightly too high under the arms - its wearable but should be no higher than the top of the bra strap, there is some bagging on the lining - caused by using stretchy denim and the method of construction. This could be improved by pulling the extra fabric in each panel over their straightest neighbouring channel and tacking.
Wednesday 7 July 2010

Flatmate-Weathers' corset is nearly done. Its not quite fully boned yet,and I still have to do the bias-binding around the top and the eyelets so it can be laced (it was being held by Weathers and her boyfriend Shum for the photograph).
I thought the differently coloured panels would have a slimming effect. But it took me by surprise by how greater an optical illusion it created.
I didn't have enough budget to buy fabric to make my own bias-binding, so I bought some pale pink satin ready-made stuff from John Lewis. I found the satin wasn't as nice to work with as the silk (not unexpectedly), but it does still look pretty, and picks out the pink colour in the flowers - in real life anyway. I must learn to take my pictures before it gets dark.
Goodbye fingertips

Today I did all the finishing off stages on Ron's corset (the one with the belt of appliqué panels). The majority of this was bias binding, measuring cutting it out, sewing it on the front with the machine, and invisible stitching it onto the lining.


I enjoy the hand sewing parts, though this corset was harder than usual, the lining layer was cortile. So instead of the nice thin silk or cotton like I had sew through before, I had extra extra thick material that really doesn't appreciate having a needle shoved into it. To the point I even had to use pliers a couple of times.


But now its finished, with a tiny 18" waist when its fully closed. We are doing a photo shoot on Sunday so I will be able to show its full glory then.
Tuesday 6 July 2010
Off to the museum...Woman's Riding Jacket


Monday 5 July 2010
I like the other way better.

As far a I can tell so far from the little I know of corsetry, there are 3 methods of putting together a corset. There is the hand sewing way, sewing all the channels through al the layers then hand sewing the panels together. There is the sew everything together as you go way, which involves sewing the facing an lining panels together with the same seam working outwards from the centre front. And the last way, the way the book says. Seen as its what my book advises I thought I would try it, sewing all the facing panels together, all the lining panels together, then sew both sets together at the ends, turn inside out and sort out the channels.
So far I'm not very impressed, it definitely takes longer than my usual (on all the other two corsets I have ever made) method, and I don't think the results are as good. I cut out the fabric as accurately as possible, but the lining is still bagging. I am currently working on the steps for sewing in the boning channels, tacking stitches "in the ditch" at the panel joins. I went with the denim for the liner in the end, and the ever so slight stretch it has is not really helping either.
Sunday 4 July 2010
Lining, a debatable concept

Today I unpicked and reworked the last of the embroidery for Flatmate-Weathers' corset, I'm glad I did because I'm so much happier with it now, the larger flowers look much less weedy and much more complete. I also cut out and mounted onto calico all the facing pieces, grey for the four front-most panels, and white for the rest.

Now the issue is, how to line it? I have some lovely fabrics lying around but they would all have to be mounted. On the other hand I have some fairly standard denim-like stuff which wouldn't need to be. It would work, but the inside wouldn't look as pretty. Decisions decisions...
Saturday 3 July 2010
Finished the embroidery...or perhaps not
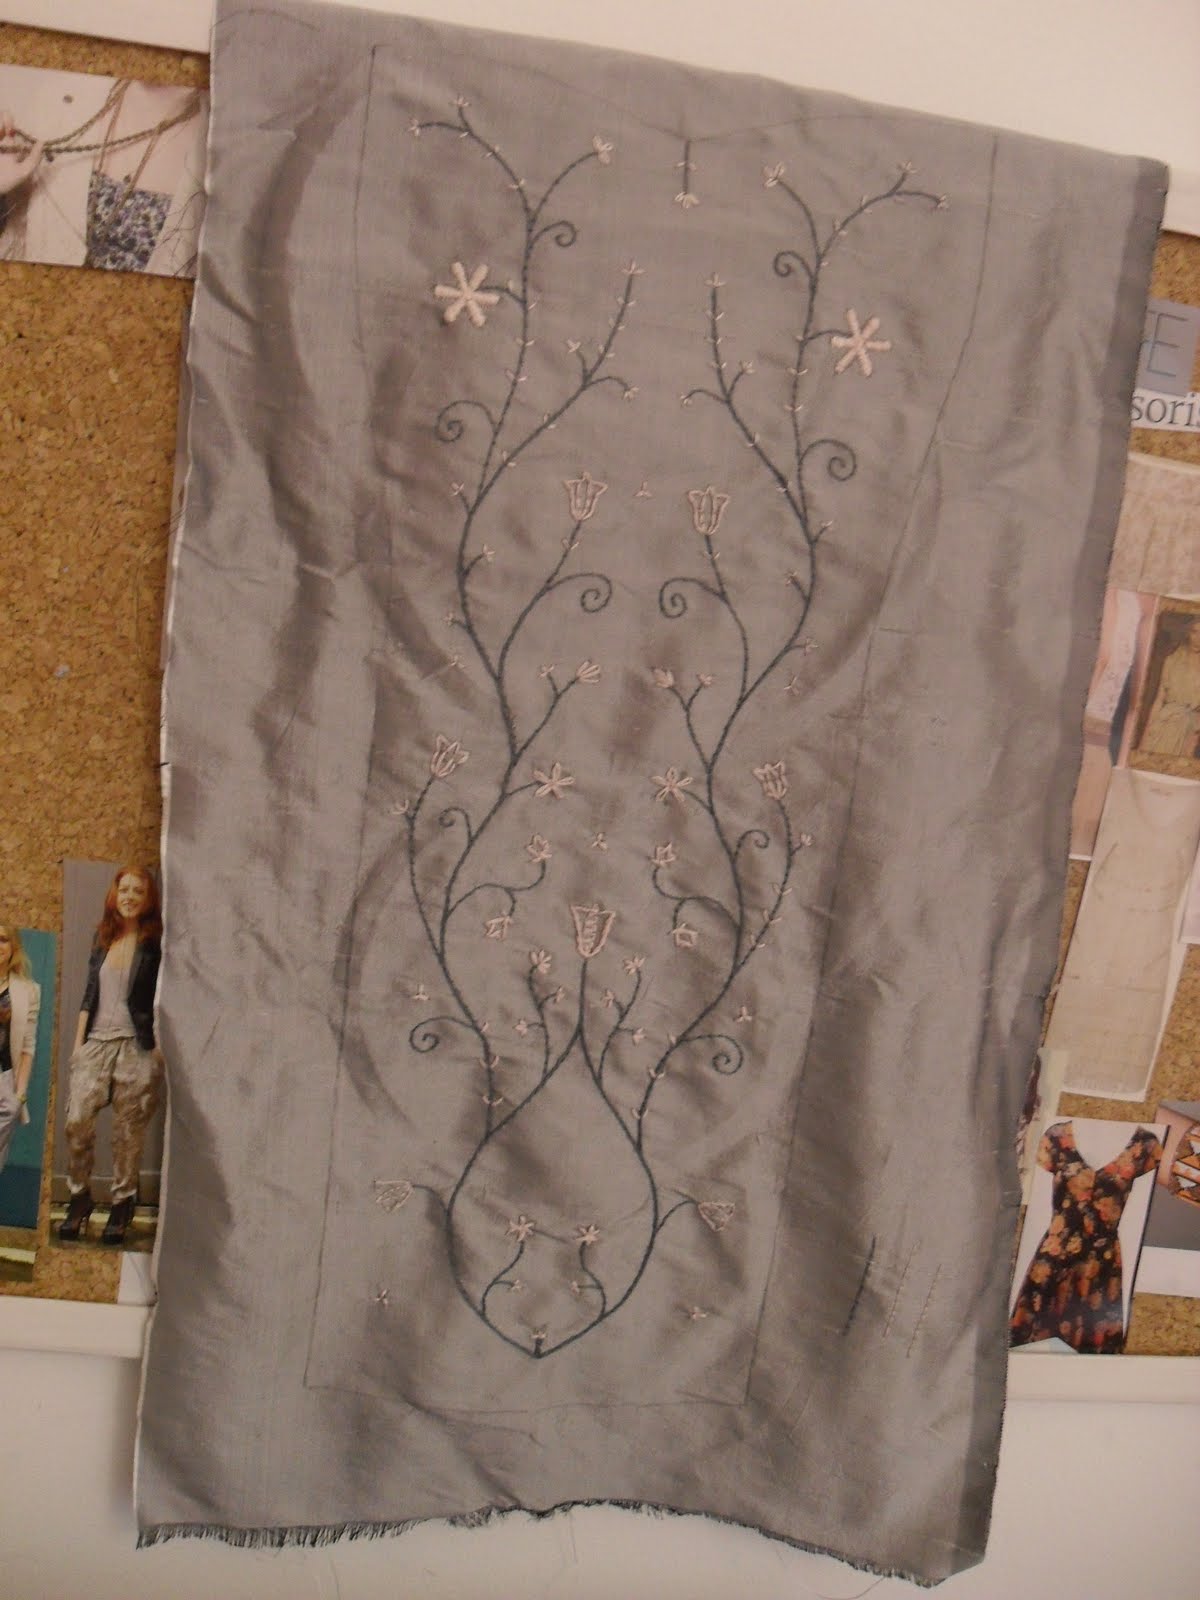
Well here is the "finished" front panel for Flatmate-Weathers corset. I am pleased with the stems, the buds, and the star-like flowers, but I'm really not feeling the tulip ones. I had a slight pink thread crisis half way through and had to go out and buy some more. But before that I tried to make it stretch further by using less strands. This made the flowers really weedy. I think I shall pick them out and start again.
Off to the museum...Court Mantua

The second little V&A outfit, 1775-85 court mantua. For some reason a bit of my brain fell out, and I didn't photograph the entire garment, so my sketch will have to do.


Ye Olde Bag lady

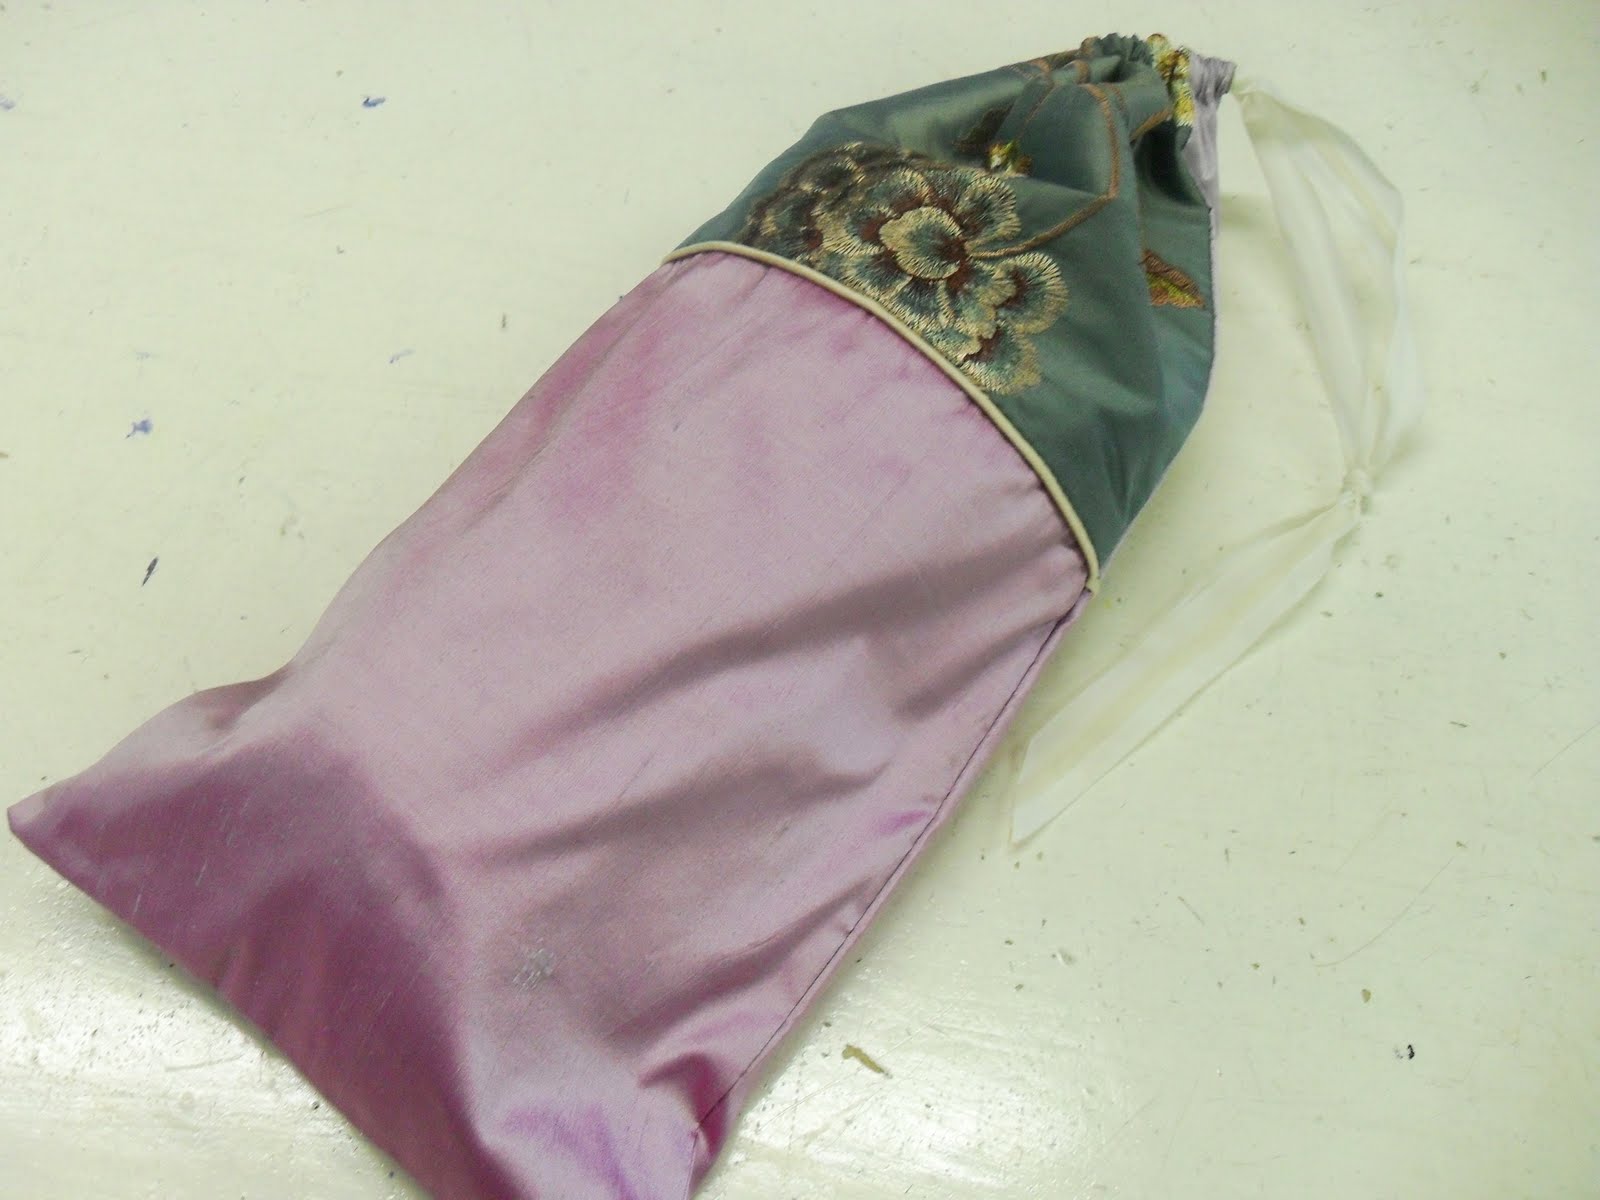
Every corset should have a bag, this is what I have decided. According to reliable sources (Denise and the internet) rolled up after an airing is the best way to store a corset. But if you leave it out it could get dusty, or have something spilt on it, or any of the infinite number of things that can damage silk past any point of recovery...tea for instance. Therefore a bag is require, a carrier would do, but it really doesn't look like much.

At the Custom Costume Company, I have been made bag lady, I get to make the cotton lined storage bags for all the corsets we make. I've made four so far (missed one picture though), and mostly I use the fabric for the bag that we used for the corset. This means if you glance at several on a shelf you can instantly tell which bag contains which corset.


Match up, check, move, check, move, check, repeat
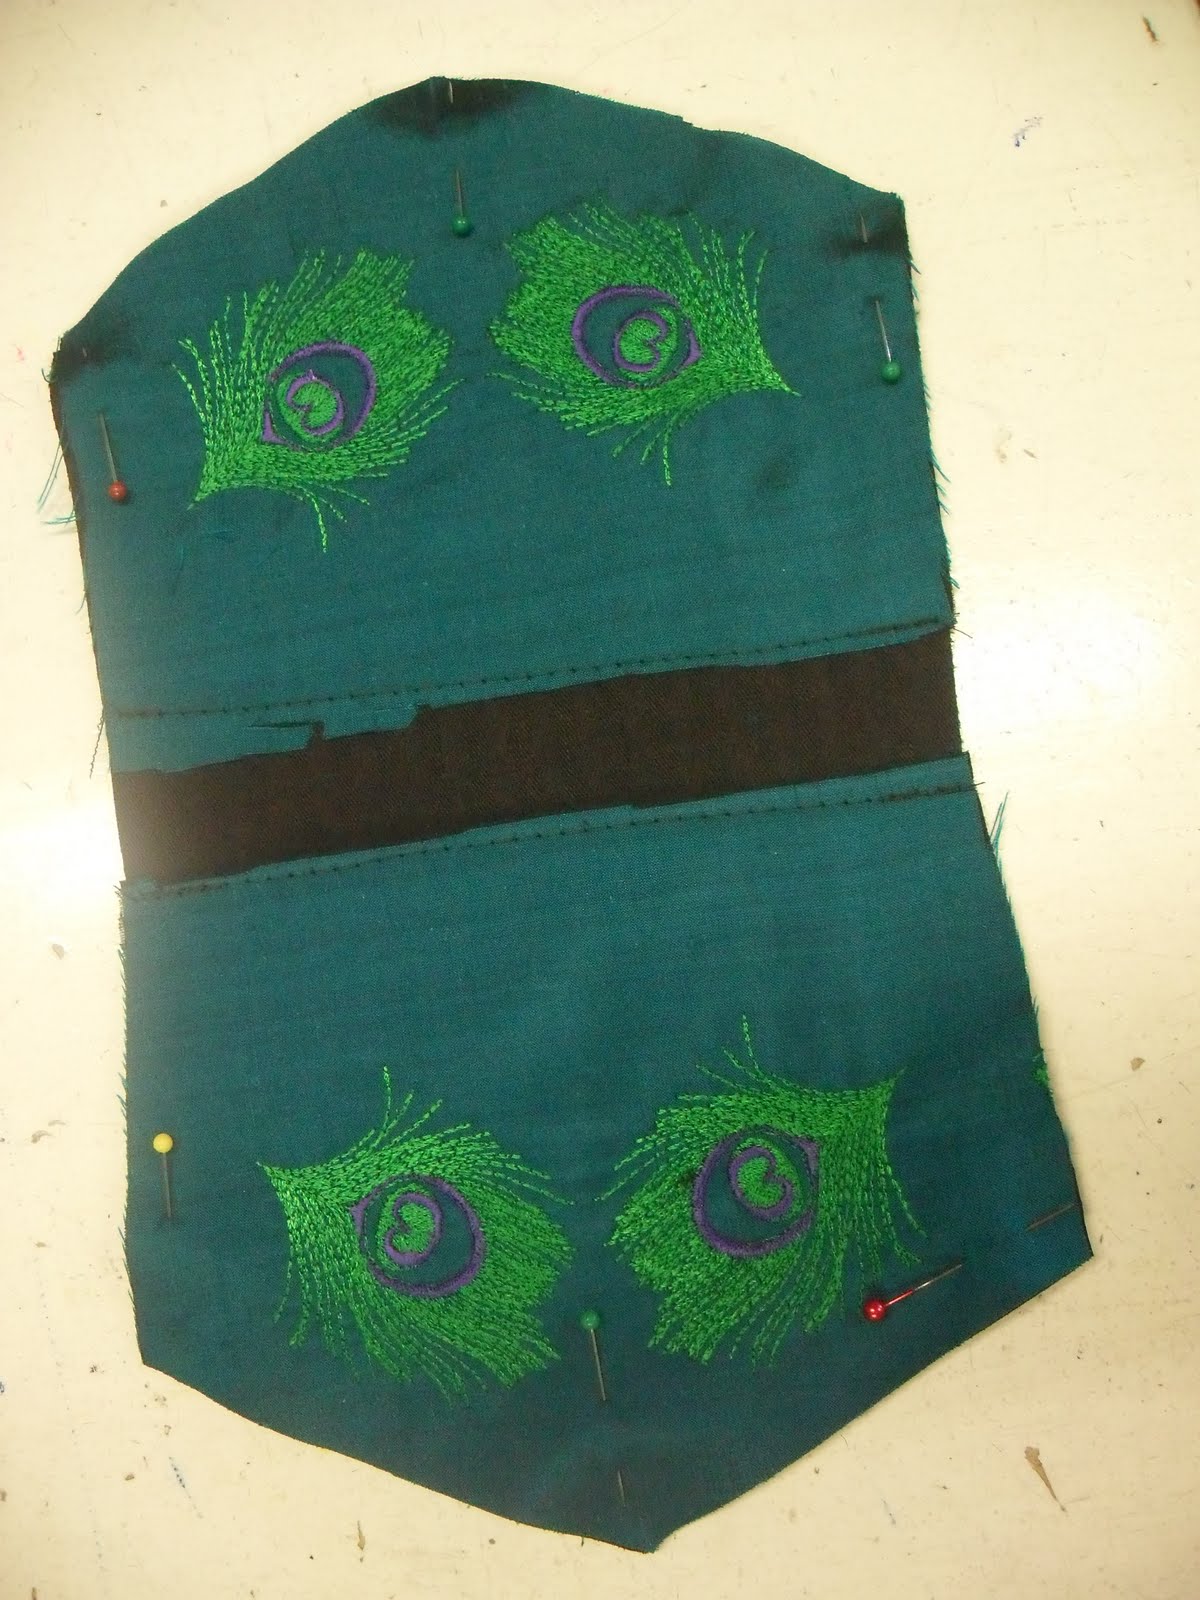
This week at the Custom Costume Company, we have been working on a dance costume for Ron. As a whole it involves a bustle (big bum cage skirt), a swag (half skirt that goes over the bustle) and a waist-cincher corset, as well as various added tid-bits just for fun. Ron has a tiny 23" waist normally, so the corset is absolutely minuscule, and to make it more interesting, its no plain ordinary corset. No, this one gets peacock embroidery and an appliqué shaped waist belt pattern.

These are the freshly embroidered back panels, I had the job of marking out the patten placement so that they exactly (or near as can be) mirrored each other. This was mainly done with pins, a ruler, and trial and error.

This is the centre front panel before the belt was added.The embroidery on this one turned out to be too close together to allow room for the belt, so Denise added the extra black band of fabric.


This is the start of the belt, the centre front piece. I used the tracing wheel and carbon paper to trace the pattern onto silk, added seam allowances and cut out, stitched with a large stitch, along the lines, and snipped the curves.


I then ironed the shape, using the stitch lines as the folding position, and pinned then tacked it to the centre front piece. The ironing took a lot of gentle teasing and edging into place, I'm still not entirely 100% happy with it, but I couldn't get it any closer.


Next I stitched around the edge with the sewing machine and removed the original edge stitches and tacking stitches. The machine stitch seamed to slightly even out the imperfections in the ironing.


I then repeated this process for every piece of the pattern. By far the most difficult part was matching up the edges so that the belt would flow round smoothly when it was all joined together. I found the most effective way to do this was mark on the seam allowances on the undersides, match two edges at once up with pins and carefully have a look to see if the belt panels matched. 60% of the time they didn't, so I had to unpick and re-work until they did.
They looked pretty good, but they haven't been sewn together yet, only then will I know how good a matching up I really managed.
Subscribe to:
Posts (Atom)